Getting Started
From scattered sources to one clear answer: PDFs, websites, and YouTube in one notebook
Bring a PDF, a web page, and a YouTube video into one notebaseAI notebook. Follow the real app screenshots to select ready sources, compare their evidence, check citations, and save your findings.
- Multiple sources
- Websites
- YouTube
- Citations
A useful research question rarely arrives with all its evidence in one file. You might have a PDF in your downloads folder, a web article in a browser tab, and an explanation saved on YouTube. Putting them in one notebook makes it easier to compare what each contributes and keep the passages behind your answer close at hand.
This walkthrough follows an actual notebaseAI session using a practice PDF, a public EPA page, and a NASA video. Every app screenshot below was captured in a disposable account using real uploads, processing, and chat. The notebook’s TEST_GUIDE_MULTI_SOURCE label identifies the demonstration. Generated wording, source titles, and your account balance may differ.
1. Choose one question and three sources
Begin with the question you want to answer, then choose a small set of relevant sources. A notebook about “urban heat” could become very broad; a notebook asking “How do trees help cool cities, and what can’t these sources establish?” gives you a concrete comparison to make.
| Source | Where to get it | What it contributes |
|---|---|---|
| Urban tree pilot practice brief | A fictional seasonal observation with explicit limitations. It teaches evidence checking; it is not a published study. | |
| Website | EPA: Benefits of Trees and Vegetation | Public background explaining cooling mechanisms and other benefits, with references to research. |
| YouTube | NASA: Urban Heat Islands | A spoken explanation of urban heat, land cover, and the context around cities. The app imports its transcript. |
The mix is deliberate: one source is a teaching example and two are public explainers. They are not three independent experiments. Keeping those roles clear is part of the task. For your own project, use material you are authorized to upload and record its author, date, and purpose before treating it as evidence.
2. Create a notebook and upload the PDF
Sign in, open the dashboard, and choose Create notebook. An empty notebook opens the Add sources dialog. To name it first, close the dialog, select Untitled notebook in the header, enter a useful title, and press Enter. Then reopen Add sources.
Use a title tied to the task, such as “Urban heat evidence comparison.” The workspace keeps sources on the left, Chat in the center, and Studio on the right. You will use each panel before finishing.
Download the urban tree practice PDF. This one-page brief is fictional teaching material, not a published study. Use it to practice the controls and evidence checks without uploading private documents.
Choose Upload files and select the downloaded PDF. Wait for the upload to reach its queued state, then close the dialog. The source can appear in the list while processing continues. Its presence alone does not mean it is ready for questions.
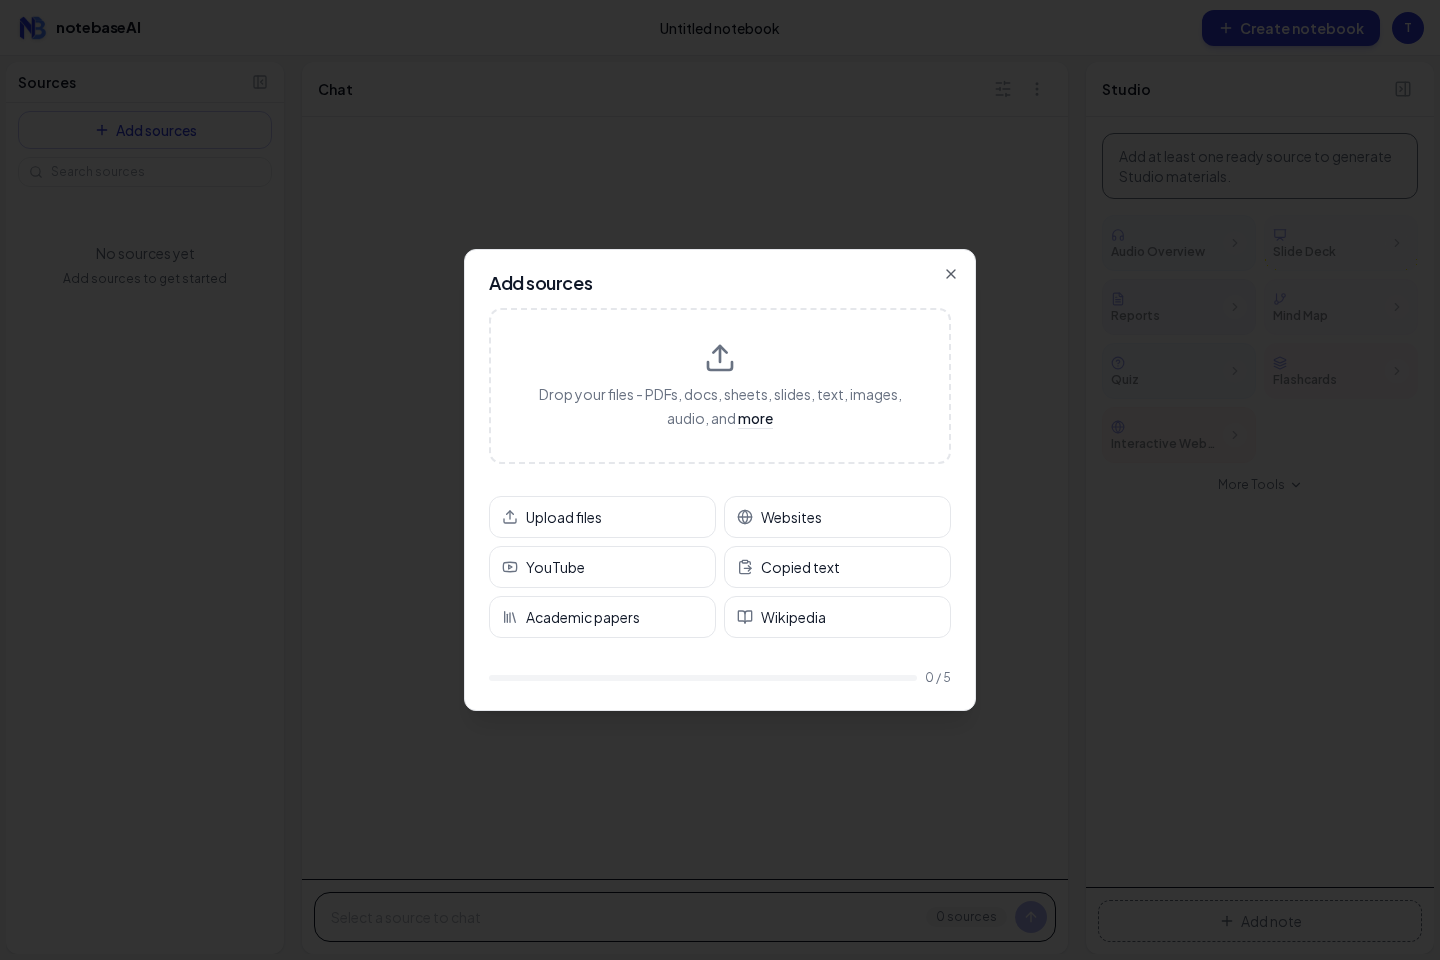
If your own document is too large or unsupported, read the upload message before trying again. Plan allowances differ; use the limits displayed in your account. For a more detailed file walkthrough, follow the PDF questions and citations guide.
3. Add a website
Choose Add sources → Websites. Paste the EPA page address into Paste a URL, then choose Insert. Use the article’s direct address rather than a search-results link or a home page that only points to it.
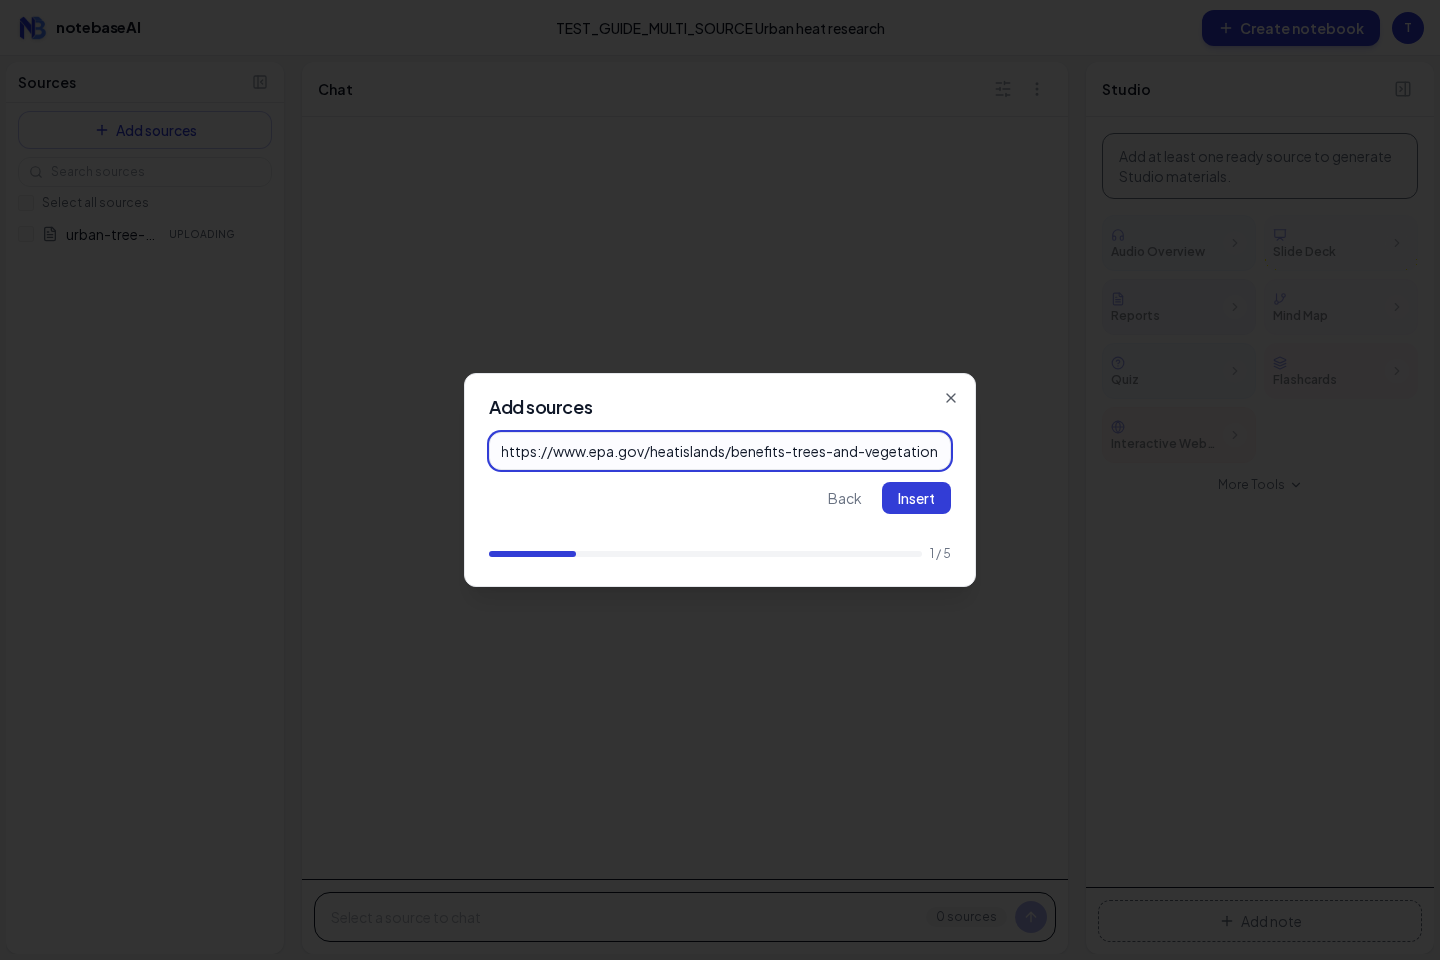
When processing finishes, open the source and check that the extracted text contains the article you intended. A web import should not be assumed to include every page on a site, a linked PDF, or content behind a sign-in. A page that loads in your browser may still prevent automated extraction.
The demonstration’s source title was generated from its content and appears as “Benefits of Trees and Vegetation in Cities.” Recognize a source by both its contents and original link, rather than expecting its displayed title to match the page heading exactly.
4. Add a YouTube video
Choose Add sources → YouTube. Paste the NASA video’s watch URL into Paste a YouTube URL and choose Insert. Add a specific video rather than a channel or playlist.
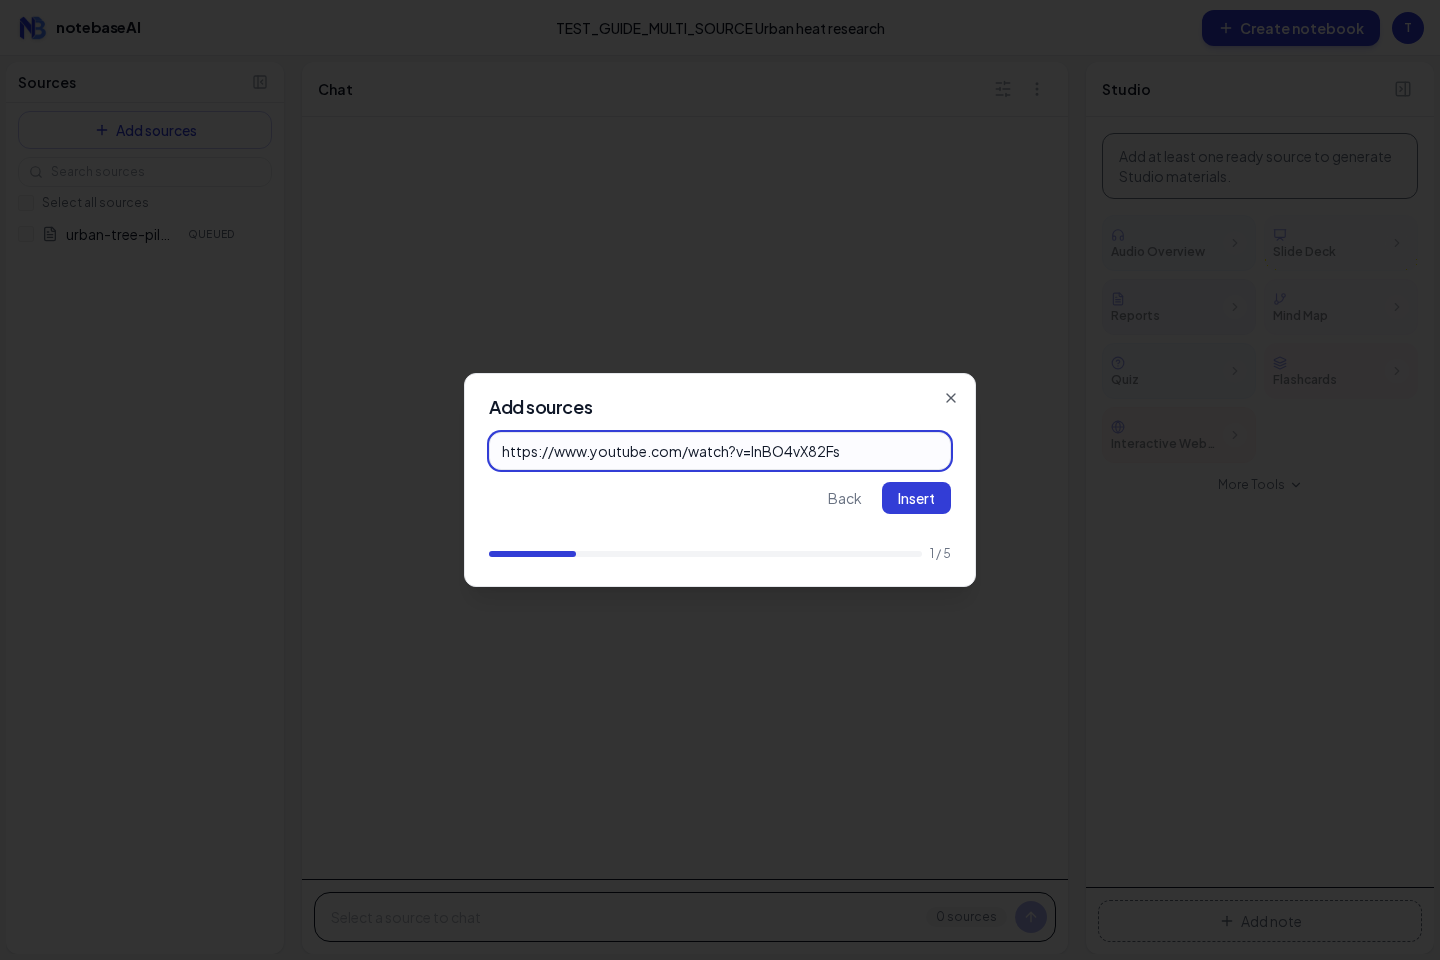
In this workflow, the evidence is the imported transcript. Do not assume the app has inspected an unlabeled chart, a map shown on screen, or a visual demonstration that the speaker does not describe. Watch the relevant section yourself when those details matter.
Our imported source appears as “Urban Heat Islands, Health, and Energy Use.” Open it and confirm that it contains the intended discussion. Caption availability and transcription quality vary, so check names, specialist terms, and numerical claims against the original video.
5. Check readiness and selection
Return to the Sources list. Wait until all three source checkboxes are enabled, then select the PDF, the EPA page, and the NASA transcript. If the notebook contains only these three sources, Select all sources is convenient. In a larger notebook, select only the sources relevant to this question.
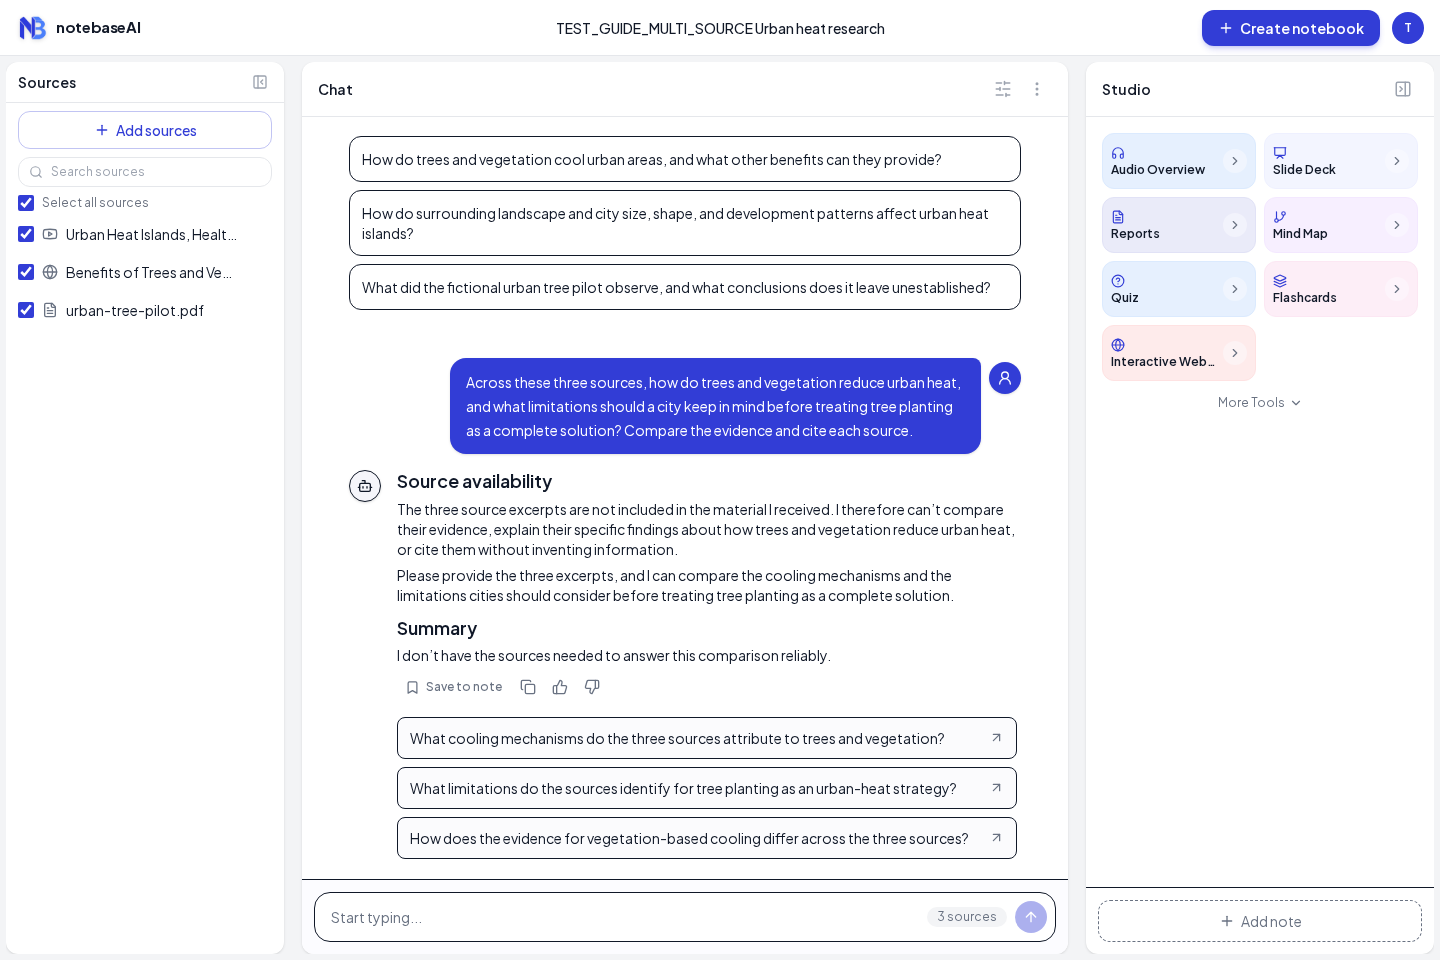
The count beside the Chat input should say 3 sources. That is the evidence set for your next request. It is different from the total number of files stored in the notebook. A source that is still processing or has failed cannot contribute just because its title is visible.
Before comparing, briefly inspect each source. Confirm the PDF is the complete brief, the web text is the expected article, and the video source contains a usable transcript. This small check prevents a polished answer from concealing the wrong input.
6. Ask for a comparison
Ask for the relationship between sources, not just three disconnected summaries. Name the sources, specify the distinction you care about, and request citations. Here is the prompt used for the successful demonstration:
Send the question and let the response finish. In our run, the answer included citations to all three sources and separated their roles: the EPA page supplied mechanisms, the practice PDF supplied a limited fictional observation, and the NASA transcript supplied broader context.
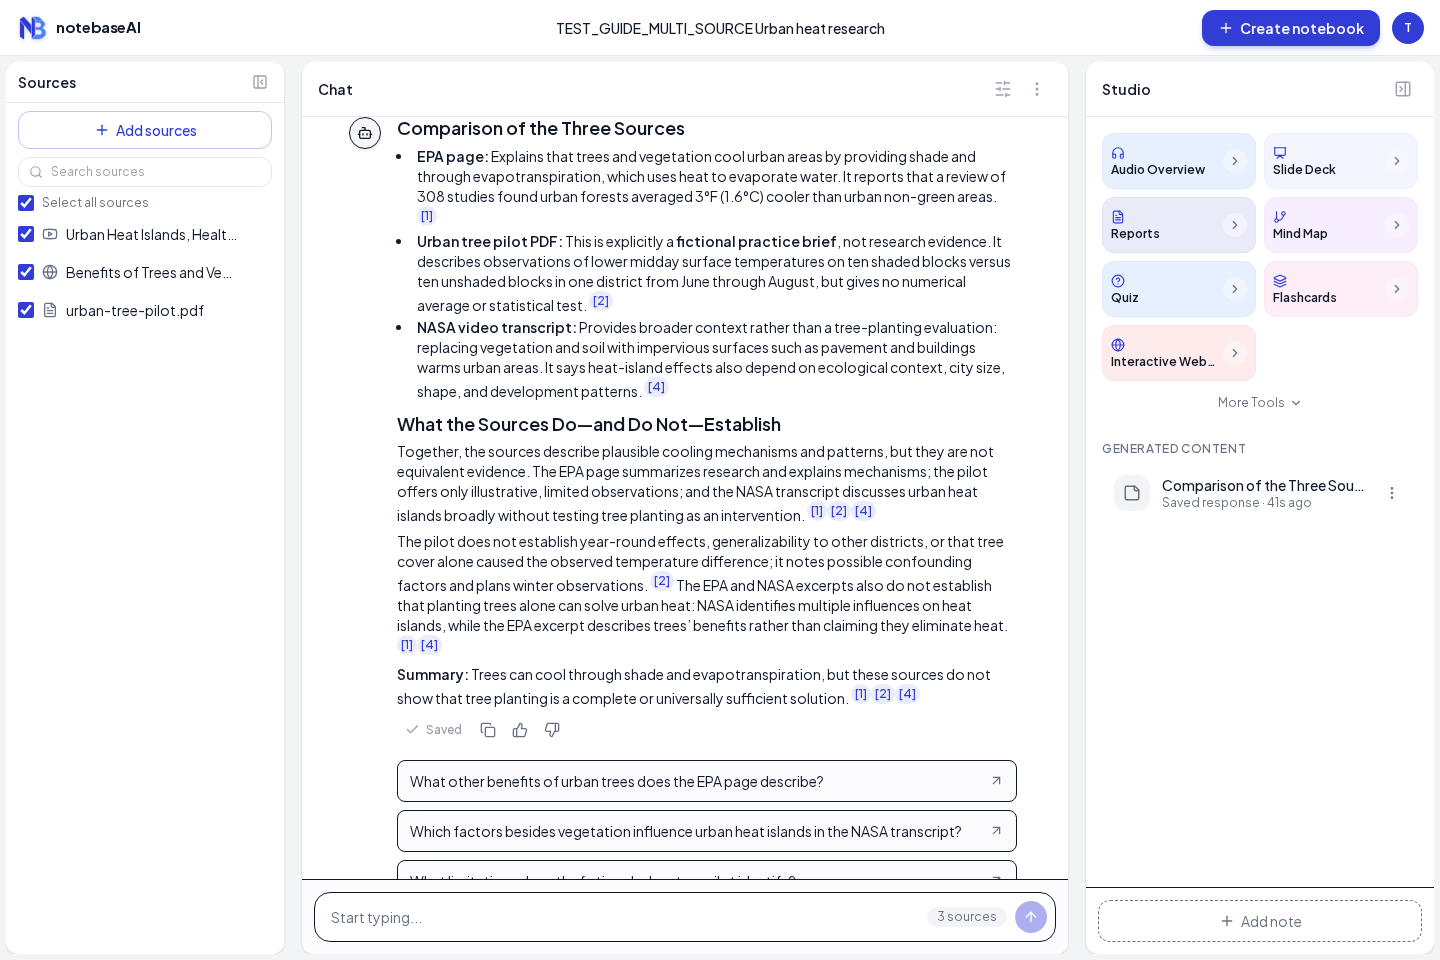
Look for differences in scope as well as agreement. A general explanation of cooling is not a local measurement, and a summer observation is not a year-round result. If the answer omits a source, ask what that source contributes and check its contents; the request to cite every source does not itself guarantee complete coverage.
A useful follow-up is “Which claims are shared across the sources, and which appear in only one?” For a deeper investigation, deselect unrelated sources and ask a narrower question. Selection lets you change the evidence set without creating another notebook.
7. Verify citations and save findings
Select a numbered citation in the answer. The source reader opens on the left; wait for its text to load and read around the cited passage. Check a citation from each source, especially any number or strong causal claim you plan to reuse.
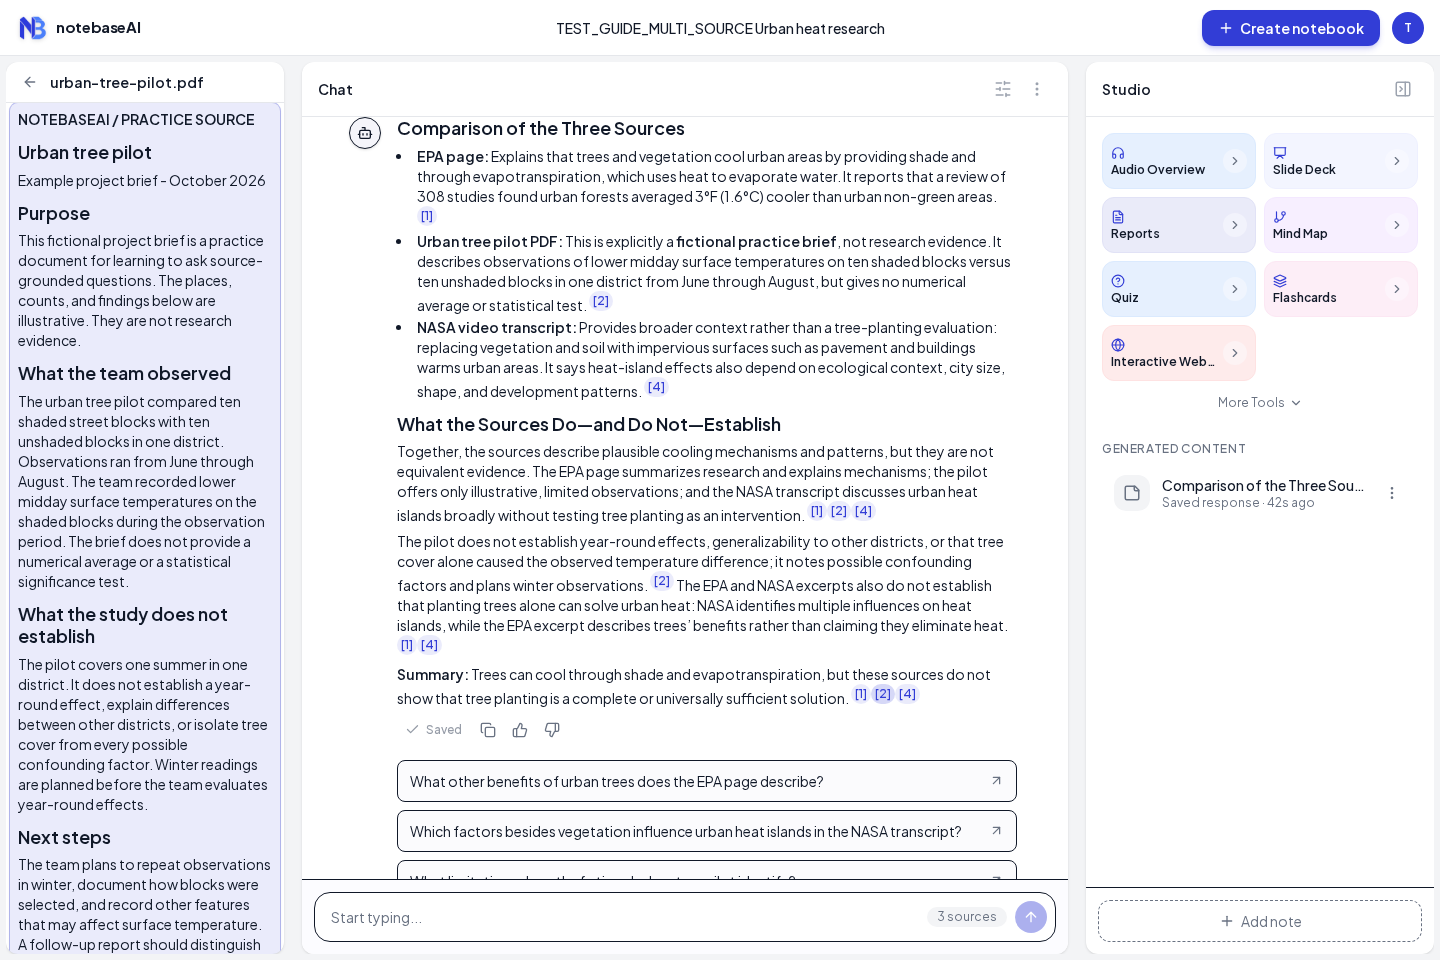
For this exercise, verify that the brief is explicitly fictional and limited in scope. Do not present it as a real study supporting the EPA or NASA material. More sources only improve an answer when you understand the quality and relevance of each one.
After checking the response, choose Save to note beneath it. The action changes to Saved, and a saved response appears in Studio.
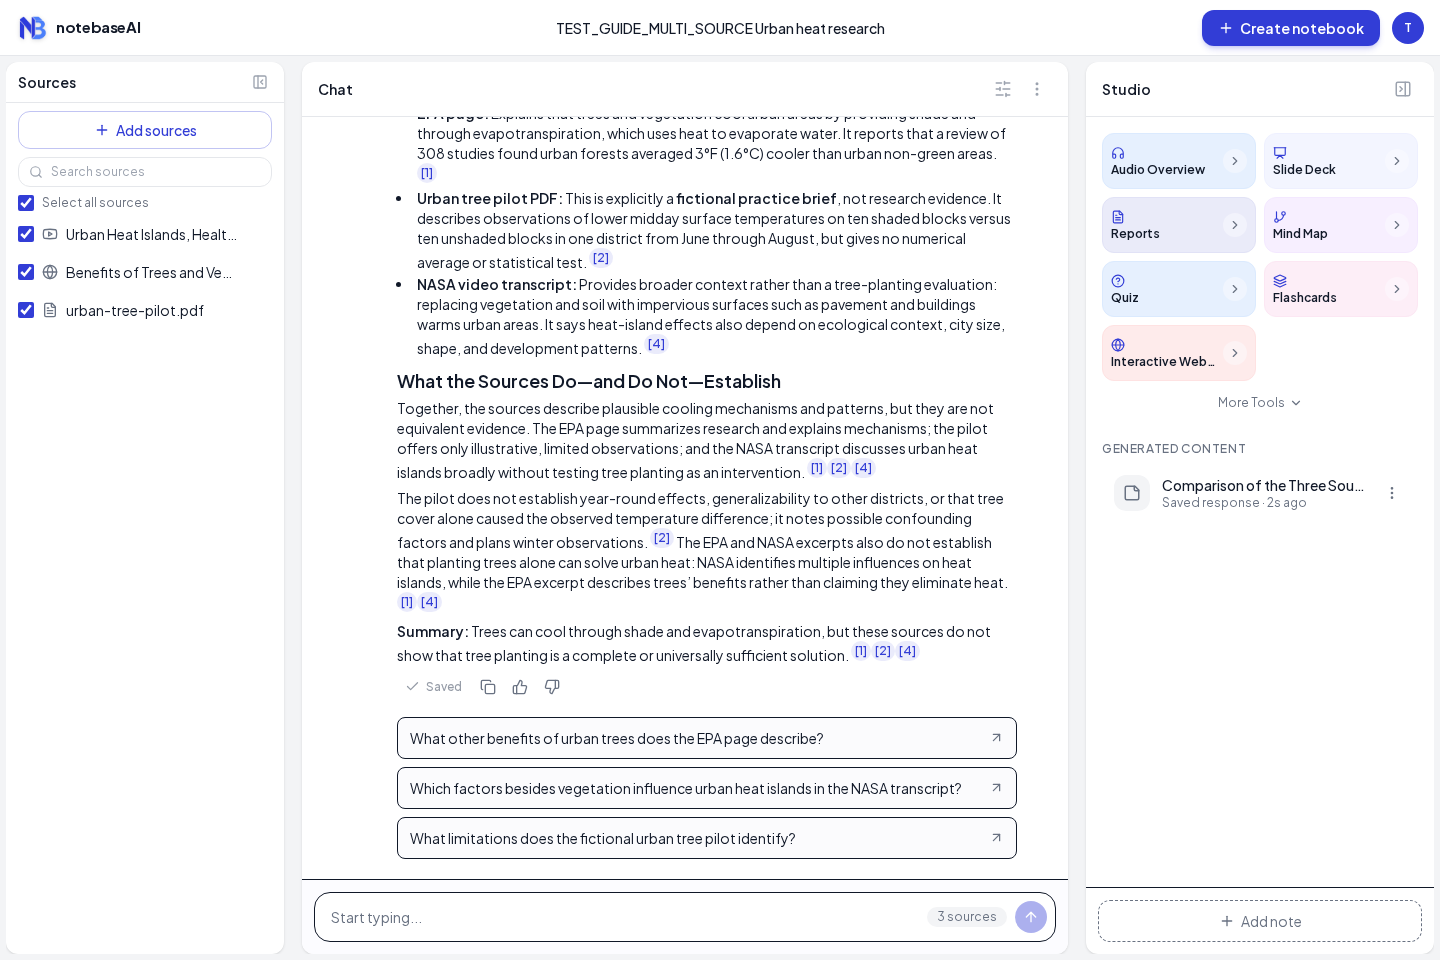
Saved responses are view only. For your own interpretation, choose Add note and separate “What the sources say,” “My interpretation,” and “What I still need to check.” The research-notes guide walks through that editable workflow.
8. Choose a useful next output
You now have three ready sources and a comparison you can inspect. Choose one next task based on what you need to do with the research. Recheck the selected sources and the settings shown in the relevant Studio dialog before generating.
- For a written synthesis, use Reports and give it the same focused question. Preserve the distinction between the fictional example and published material.
- For revision, follow the flashcards and quizzes guide. Check generated answers before studying them.
- For listening, follow the audio overview guide and choose a focus that fits your source set.
These are optional next workflows. The screenshots here demonstrate importing, comparing, verifying, and saving; the linked guides cover their own generation controls. Check the displayed credit cost and allow an existing job to finish before starting another copy.
9. Recover when something stalls
| What you see | What to check next |
|---|---|
| A source is listed but cannot be selected | Wait for processing to finish. Read its status and any error; reopening the notebook can confirm the current state. |
| A file upload fails | Check the file type, displayed size limit, and network error. Retry after addressing the error; avoid accumulating duplicate failed uploads. |
| A website imports the wrong or incomplete text | Use the direct article URL and inspect the source reader. If you have permission, add the relevant text through Copied text and label it as an excerpt. |
| A YouTube source fails or has poor text | Check that the video is accessible and has usable captions. Verify the original transcript, or choose another relevant source. |
| Chat says it cannot see the sources | Recheck that processing has finished and the intended checkboxes are selected. Reopen the notebook and ask a focused question naming those sources. If it still fails, treat the answer as unavailable. |
| The answer uses only part of the source set | Ask what each source contributes, inspect the missing source, and verify the citations. Do not infer that every selected source supported every claim. |
The first chat attempt in this demonstration reported that it had not received the source excerpts. After processing had settled, we reopened the notebook and used the explicit comparison prompt above; the new answer cited all three sources. This is a recovery observed in one session, not a guarantee that every missing-context error resolves the same way.
Before closing your notebook, confirm that your saved item is present and that you can identify the source behind each important claim. That gives your next session a clear starting point: a question, an evidence set, a checked answer, and the uncertainty you still need to resolve.